Pages

Showing posts with label biscuits/cookies. Show all posts

Wednesday, 14 January 2015

Butter sugar love


There's nothing more exciting than plotting what cakes and biscuits to bake for Christmas. For me anyway. The moment December descends, I'm almost always seized by a certain madness involving butter, sugar, flour, eggs and generous lashings of vanilla.


The 2014 plan was for the traditional Christmas Cake, Pineapple Jam Tarts, Chocolate Biscuits, Cashew Nut Biscuits and the super easy Sugee Biscuits. Then, a week before Christmas I fell ill. As I usually put off Christmas baking until the last week leading up to the day it was very frustrating. The only good news I had was that the all-important Cake was made and sitting quietly in a cool, dark place.


I baked anyway. A biscuit a day. Starting with the Chocolate Biscuits and ending with the Pineapple Jam Tarts. I would have liked to make at least one more type of biscuit but the Tarts took me almost six hours to make and completely did me in. I was so tired, I decided enough was enough. No more baking until I was well again.


The new kids on the block were the Cashew Nut Biscuits. The recipe I used was adapted from here. It turned out to be a most delicious biscuit. Most people loved it, the exceptions being the die-hard Pineapple Jam Tart fans.

Cashew Nut Biscuits
Adapted from KitchenTigress

150g Butter, softened
180g Caster Sugar
1 teaspoon Vanilla Essence
1 Egg
1/4 teaspoon Salt
200g Plain Flour
1/2 teaspoon Baking Powder
200g Cashew Nuts, toasted, cooled and ground into a powder
130g raw Cashew Nuts, split into halves
2 Egg Yolks, beaten

Preheat the oven to 140 Celsius. Sift the Flour and Baking Powder together. Set aside. Line a couple of baking trays with baking paper. Set aside.

Cream Butter and Sugar with an electric mixer until light and fluffy. Add in Egg, Vanilla Essence and Salt. Mix again. Gently fold in the Flour and Baking Powder. Then fold in the Ground Cashew Nuts. If the dough is sticky, add in a little Flour at a time until it leaves the sides of the bowl cleanly. Divide dough into 8 pieces and place in the fridge for 15 minutes.

Dust a flat surface lightly with Flour. Roll out a piece of dough at a time and cut into shapes just slightly larger than a cashew nut. Place shapes on the prepared baking tray. Roll and cut shapes until all the dough is used up.

Brush with Egg Yolk and press a raw Cashew Nut half on each biscuit flat side down. Brush again with Egg Yolk.

Bake at 150 Celsius until golden brown, about 25 to 30 minutes. Once done, remove from the oven and cool completely on the baking tray. Store in an airtight container.



Saturday, 27 September 2014

Come to tea and biscuits

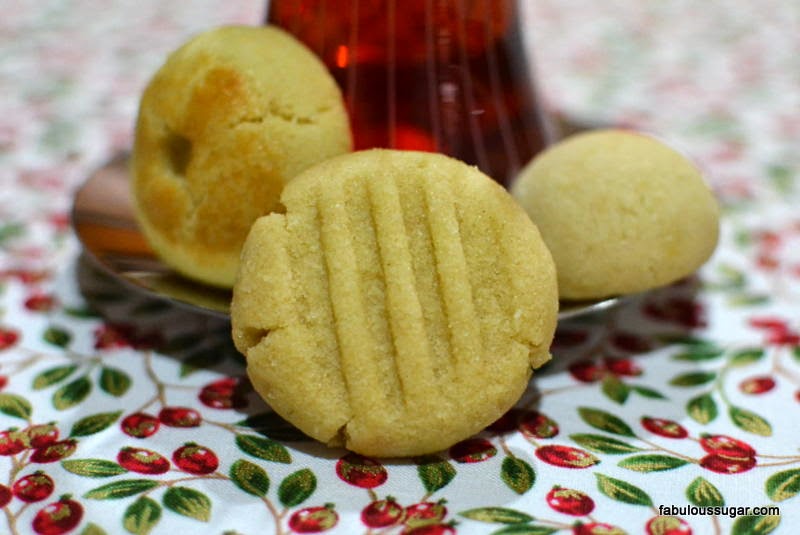
In the days running up to my holiday, I was restless. The Turkish Cay glasses came out and I set out to bake small batches of little nibbly biscuits to go with the copious amounts of tea I'd started drinking. 


These biscuits were truly a delight. They came together quickly and were melt-in-the-mouth delicious. Perfect as a pick-me-up or hostess gift in a hurry. Or perhaps for no reason at all but to accompany glasses of umber-coloured Cay while contemplating the endless delightful possibilities awaiting on your holiday.


Chinese Almond Biscuits
Adapted from BreadetButter

150g Plain Flour
100g Ground Almonds
65g Caster Sugar
Scant 3/4 teaspoon Baking Powder
Scant 3/4 teaspoon Baking Soda
1/2 teaspoon Vanilla Essence
A few drops Almond Essence
A pinch of Salt
100ml - 150ml Grapeseed Oil (or any other odourless Oil)
1 Egg White, beaten

Preheat the oven at 140 Celsius. Line a baking tray and set aside. 

Put all the dry ingredients into a mixing bowl. Whisk everything together. Make a well in the centre and add in the Essences and a little of the Oil. 

With clean hands, gently bring the dry ingredients into the wet. Add the Oil little by little as you go until you have a soft, crumbly dough that comes away from the sides of the bowl cleanly. (depending on the weather and type of Oil used, you may need slightly more or less of it than stated in the recipe)

Roll into little balls and place on the baking tray. With a chopstick, make indents in the centre of each biscuit. Brush each biscuits with the Egg White. Bake at about 150 Celsius for about 20 - 25 minutes or until the tops turn a light golden brown. Leave to cool on the tray before storing in an airtight container.


Variation:
Coconut Oil Almond Biscuits

150g Plain Flour
50g Ground Almonds
60g Caster Sugar
1/2 teaspoon Baking Powder
1 teaspoon Vanilla Essence
A pinch of Salt
6 - 8 tablespoons of liquid organic virgin Coconut Oil

Preheat the oven at 140 Celsius. Line a baking tray and set aside. 

Put all the dry ingredients into a mixing bowl. Whisk everything together. Make a well in the centre and add in the Essence and a little of the Oil. 

With clean hands, gently bring the dry ingredients into the wet. Add the Oil little by little as you go until you have a soft, crumbly dough that comes away from the sides of the bowl cleanly. (depending on the weather and type of Oil used, you may need slightly more or less of it than stated in the recipe)

Roll into little balls and place on the baking tray. Bake at about 150 Celsius for about 20 - 25 minutes. Biscuits will not turn brown, but to avoid over-baking remove from the oven at the time specified. Leave to cool on the tray before storing in an airtight container. 


Semolina Almond Biscuits
Adapted from The Little Teochew

100g Plain Flour
60g Semolina
40g Ground Almonds
1/4 teaspoon Salt
1 teaspoon Vanilla Essence
A few teaspoons Ghee

Preheat the oven at 140 Celsius. Line a baking tray and set aside. 

Put all the dry ingredients into a mixing bowl. Whisk everything together. Make a well in the centre and add in the Essence and a little of the Ghee. 

With clean hands, gently bring the dry ingredients into the wet. Add the Ghee little by little as you go until you have a soft, crumbly dough that comes away from the sides of the bowl cleanly. 

Roll into little balls and place on the baking tray. Press down with the back of a fork. Bake at about 150 Celsius for about 20 - 25 minutes. Leave to cool on the tray before storing in an airtight container. 


Wednesday, 19 March 2014

The best Chocolate Chip Cookie EVER

These really are the best soft Chocolate Chip Cookies ever and I have tried many, many recipes in search of the One. This is it.


You see, despite the fact that most of those cookies have never seen the light of day on my blog, I've actually made Thomas Keller's Chocolate Chip Cookies, the famous Jacques Torres cookies, the Cook's Illustrated version and many, many more over the years. 

Interestingly, I have had this recipe bookmarked for a long, long time. (Yes, I can sometimes be the world's greatest procrastinator.) Every time I feel like having a really good soft chocolate chip cookie I would click on the bookmark to Alice's site and ogle at her beautiful cookies. 

Anyway, recently I decided to get off my you-know-what and actually make some. I am glad I did. I did tweak the recipe somewhat as sometimes when you make a recipe created in a temperate climate in the tropics it doesn't always turn out well. So I went with my instincts and the result is perfection. Perfection is crispy edges, a lusciously chewy centre paired with melty chocolate and hints of coffee-toffee in every bite.


I cannot wait to try this dough with toasted Macadamias, white chocolate chips or even turn it into a Cranberry-Orange delight for a seasonal delight. Enough said. 

THE BEST CHOCOLATE CHIP COOKIES EVER
Adapted from Alice Currah

227g Salted Butter, softened
260g Light Brown Sugar
100g Caster Sugar
Pinch of Salt
1 Egg and 1 Egg Yolk
2 teaspoons Vanilla Essence
4 teaspoons brewed Coffee
340 - 360g Plain Flour
1 teaspoon Bicarbonate of Soda
1 teaspoon Baking Powder
2 1/4 cups Semi-Sweet Chocolate Chips

Preheat the oven at 170 Celsius. Line 3 - 4 baking trays with baking paper. 

In a large bowl, cream Butter, both Sugars and Salt by hand with a spatula. Add in the Egg and Egg Yolk. Mix well. Add in the Vanilla Essence and Coffee. Mix well. 

Gently fold in the Flour, Bicarbonate of Soda and Baking Powder. If the dough seems sticky, add in Flour a little at a time until you get a dough that doesn't stick to the spatula you are mixing it with. Gently fold in the Chocolate Chips. 

Using a 2-teaspoon cookie scoop, scoop dough onto the prepared baking trays. Bake the cookies at 180 Celsius for about 10 - 15 minutes or until slightly brown at the edges.

Remove from the oven and let it cool on the trays before removing and storing in an airtight container. 

Note
To keep cookies moist, place a slice of fresh bread in the container along with the cookies. Cookies are best eaten within the first two days of baking.  

Sunday, 16 March 2014

Vanillekipferl: Delicious Days

My interest in German baking was piqued when in Berlin last year. Even outside the Christmas season, the city is packed with bakeries on every street corner selling buttery, sugary morsels of deliciousness alongside freshly baked loaves of fragrant bread.


The Vanillekipferl is a classic German biscuit usually baked at Christmas. While it's definitely out of season now, that's no excuse for not making them! 

These goodies also have a little history behind them. The story goes that a long time ago, the Ottomans - in attempts to expand their empire - worked very hard to invade and conquer lands in Austria/Hungary. To stop them the Polish, Germans and Austro-Hungarian forces got together to drive the Turks out of their lands forever and won. To celebrate, bakers made little crescent-shaped biscuits - which mimics the crescent on the Turkish flag - to commemorate the victory.


Historical or not, these biscuits are some of the best biscuits I've ever made. It's ever-so-slightly crunchy, tender and melts in your mouth. Be warned. They're highly addictive! 

Vanillekipferl
Adapted from Delicious Days

175g Salted Butter, softened
80g Caster Sugar
Pinch of Salt
100g Ground Almonds
200g Plain Flour
1 teaspoon Vanilla Essence
2 Egg Yolks

Some Icing Sugar mixed with a little Vanilla Powder

In a large bowl, place the Butter, Sugar, Salt, Ground Almonds and Flour. Mix through with a whisk.

Make a well in the centre. Add in the Yolks and Vanilla Essence. With a spatula, gently mix all the ingredients together until it forms a ball of dough that comes away  almost cleanly from the sides of the bowl. Divide dough into two and roll each part into a log in some baking paper. Secure the ends and place both logs in the fridge for an hour.

When ready to bake, preheat the oven to 120 Celsius and line the baking trays with baking paper.

Remove one log of dough from the fridge. Cut into equal slices and halve each slice. Roll each half into a short rope and use your fingers to taper the edges. Bend into a crescent and place on a baking tray. Do this until all the dough is used up. Chill the biscuits and baking tray for 15 minutes.

Place the baking tray in the oven. Increase the heat to 155 Celsius and bake for about 20 minutes. Bake one tray at a time.

While the biscuits are baking mix the Icing Sugar and Vanilla Powder in a bowl. Then get an empty container ready and line it with baking paper.

As soon as the biscuits turn a light golden in colour, remove them from the oven. Using a spatula transfer a few of them to the Icing Sugar mixture. (Be careful as the biscuits will be very fragile at this point.) Dust the biscuits in the Icing Sugar, then transfer to a container. Do this in batches while the biscuits are still hot.

Repeat with the second tray of biscuits.

Biscuits will keep for a few days in an airtight container... if they last that long!


Saturday, 15 February 2014

The famous Beurre & Sel Jammers

Beurre & Sel Jammers... neatly stacked, waiting to be eaten

This is another Dorie Greenspan recipe. I know it looks like I've been baking her recipes over these past few weeks, but I haven't. This is actually from a few weeks ago. Before Chinese New Year in fact.

I'd had this recipe bookmarked on Epicurious for a very long time. I've had the inclination to eat them ever since I saw them posted elsewhere, but couldn't be bothered to make them until now. This is what some people describe in reverse as the flesh is willing but the spirit is weak.

Still, I did half the recipe as I couldn't quite bring myself to make a big batch, nor did I want to slave over them. I wanted quick and easy with gorgeous results (don't we all?).

Also, in my excitement to finally make them, I didn't read through the whole recipe and so completely missed out on the dough chilling time, which incidentally made them even more quick and easy!

They turned-out to be quite the delight to those I shared them with. I was even asked for the recipe. Imagine that!

BEURRE & SEL JAMMERS
Adapted from Epicurious

Streusel
45g Plain Flour
30g Caster Sugar
Pinch of Sea Salt
45g Salted Butter, cold and cut into small pieces
1/4 teaspoon Vanilla Essence

Some jam (I used Marks & Spencer's Turkish Black Cherry & Vanilla)

Cookie Dough
113g Salted Butter, room temperature
50g Caster Sugar
10g Icing Sugar, sifted
Pinch of Sea Salt
1 large Egg Yolk, room temperature
1 teaspoon Vanilla Essence
120g Plain Flour

Equipment
2 medium-sized 12-cup cupcake tins

Streusel (do ahead)
In a bowl, rub Butter, Flour, Sugar, Vanilla and Salt together until it resembles breadcrumbs. Place in a tupperware and chill. 
Cookie Dough
Preheat oven at 120 Celsius. Lay out the 2 medium-sized 12-cup cupcake tins. In a large bowl, cream Butter and Sugar till pale and creamy. Add in Salt, Egg Yolk and Vanilla. Beat for a few seconds. Gently fold in Flour by hand until just combined. Dough will be soft and sticky.

Wet your hands and pinch off walnut-sized balls of dough. Pat dough gently into one of the holes of the 12-cup cupcake tin, covering the bottom. Do this until all the dough is used-up. Keep wetting your hands in between if you need to or the dough will stick to your fingers and you will not be able to pat it down properly.
Assembly & Baking
Place a teaspoon of Jam in the centre of each pat of dough. Then sprinkle the Streusel carefully around the jam. Do the same for the rest of the dough until all the Streusel is used-up.

Place the cupcake tin in the oven and increase the heat to 150 Celsius. Bake until the cookies are golden brown and jam is bubbling. Bake one cupcake tin at a time.

Remove from the oven and let the cookies cool completely in the tins.

Run a tea knife around the edges of the cookie carefully and it should release easily. Store in an airtight container for up to 2 days.  


Monday, 10 February 2014

Shortbread Buttons


I have been waiting a long time to make these, and now I have. You can use any cut-out biscuit recipe or this simple shortbread recipe which is similar to the 1-2-3 Butter Cookies with a slight twist. What I would love to do next with this is to tint the dough in pastel shades to get a box full of colourful buttons!


SHORTBREAD BUTTONS

100g Icing Sugar, sifted
200g Salted Butter, cold and cubed small
300g Plain Flour
1/2 teaspoon Vanilla Essence

Extra Icing Sugar
A little Vanilla Powder

Medium round biscuit cutter
Small round biscuit cutter
3 - 4 plastic straws

Preheat the oven at 130 Celsius. Line a baking tray or two with baking paper. Set aside.

Place Butter and Sugar in a large bowl. With an electric mixer, cream Butter and Sugar for 1 minute. You don't want to warm the Butter up too much.

Fold in the Flour gently by hand until just incorporated. You may need to use your hands to bring it together into a ball that leaves the sides of the bowl. Divide the dough in the bowl into two equal parts.

Sprinkle a little Flour on a flat work surface and lightly flour a rolling pin. Roll one half of the dough out gently until about 1/4 inch thick. Cut-out medium-sized rounds and place them on the baking tray. Do this until all the dough is used up.

With a smaller round biscuit cutter, make indents inside the cut-out rounds (like that of a button). Then take a straw and cut-out four little holes in the middle of the biscuits. You will have to cut-off the part of the straw which has dough pressed into it after every biscuit or it will get stuck and you will not be able to make more clean little holes. Do this until you have made every round look like buttons.

Bake at 150 Celsius for about 15 to 20 minutes or until the edges are very slightly golden. Remove from the oven and let the biscuits cool on the tray.

While the biscuits are cooling, mix sifted Icing Sugar and a little Vanilla Powder in a bowl. Once the biscuits are cool, dip and dust them in the Icing Sugar mixture. Place in an airtight container and eat at leisure.

Tuesday, 14 January 2014

Perfect Shortbread


I have long followed Felicity Cloake's How to Make the Perfect... series of articles in The Guardian online. However, it was only this recipe (so far) that got me to go into the kitchen to actually try it out. You see, despite my love for her series, I have never actually bothered to try her recipes.

What got me into the kitchen was the fact that this recipe was so simple. Also, considering I bake almost every week, I always, always have all the ingredients for shortbread in the pantry, except this time... so I had to substitute the ground rice with semolina which turned out very well. Very well indeed. It yielded a crunchy, crumbly, buttery and utterly delicious biscuit.


PERFECT SHORTBREAD
Adapted from Felicity Cloake

115g Salted Butter, at room temperature
55g Raw Sugar
1/2 teaspoon natural Vanilla Essence
130g Plain Flour
40g fine Semolina
A pinch of Sea Salt
More Raw Sugar to finish

  1. Preheat the oven to 140 Celsius. Line a 19cm tart tin with baking paper. Set aside.
  2. In a large bowl, beat the Butter and Sugar with a wooden spoon until well-mixed. About 2 minutes.
  3. Mix through the Vanilla Essence. 
  4. Fold in Flour, Semolina and Salt gently until well-combined. 
  5. Transfer dough into the tart tin, pat down gently, leaving about half an inch space between the dough and the rim.
  6. Bake for about an hour and a half or until the shortbread is cooked through but not browned. Check the shortbread at the hour mark to judge the additional cooking time.
  7. Remove from the oven, sprinkle on more Sugar, cut into wedges with a sharp knife and let it cool completely before storing in an airtight container. 


Sunday, 21 April 2013

Hazelnut-Nutella Biscuits


I've been ill... and these are my redemption biscuits. The ones to make me feel better after a bout of flu, sore throat and fever. I miss my mother very much during these times and wish she were still around to nurse me to health like in the old days. 

These are not fancy biscuits. They're homey and hit the sweet spot. They may look dry but they're actually the perfect combination of sturdy, crumbly biscuit and ooey gooey Nutella. What can go wrong with Nutella anyway? It is after all the chocolate-hazelnut butter of the gods! 

HAZELNUT-NUTELLA BISCUITS

80g organic unbleached Plain Flour
40g organic wholemeal Plain Flour
30g Ground Hazelnuts
125g Butter, softened
50g Caster Sugar
Pinch of Salt

Preheat the oven to 160 Celsius. Line a tray with baking paper and set aside.

Cream Butter, Sugar and Salt till light and fluffy. Fold in both the Flours and Ground Hazelnuts with a spatula until just combined. The dough will look crumbly, so with clean hands bring the dough together into a ball.

Divide the dough into 16 balls and place on the prepared baking tray. Make indents into the balls by pressing them down with your thumb. The dough may crack at the sides but it's okay.

Bake for 10 minutes and then rotate the trays back to front and bake another 10 minutes for even baking. Remove from the oven and with the handle of a wooden spoon press down gently on the indents again. Put back into the oven for another 5 minutes to set, remove from oven and cool completely on the baking tray.

Once cool, fill with as much Nutella as it will hold. Store in an airtight container on a single level. Do not pile them on each other as the Nutella will not set hard. 

Monday, 25 March 2013

5-Ingredient Nutella Cookies with Sea Salt

Please don't ask me how or why I am bitten by the Nutella bug. Please don't ask me how much time I spent last night looking for the perfect cake and cookie recipes with this gorgeous chocolate-hazelnut spread in it. Please don't ask me how I went off to the shops yesterday and again today to buy Nutella and more Nutella. Please don't ask me why I made these on a Monday night, or why I'm talking about them when it's just about time for me to go to sleep. I just did and so here it is. 


This is one of those times when the phrase 'Don't judge a book by its cover' comes to mind. Nothing much to look at but beautiful inside. 

These cookies looked like chocolate lace when I pulled them out of the oven. I had a small panic attack that perhaps they were baked crunchy throughout? They weren't. They were gorgeous. Fudgy, chewy, gooey gorgeous. I had three. 

5-INGREDIENT NUTELLA COOKIES WITH SEA SALT
Adapted from Ambitious Kitchen

1 cup Nutella
1 tablespoon Light Brown Sugar
1/4 teaspoon Sea Salt
1/2 cup plus 1 tablespoon Plain Flour
1 Egg
More Sea Salt for sprinkling

In a large bowl, mix the Sugar, Sea Salt and Plain Flour together. Add the Nutella and Egg. Mix with a spatula until well combined. 

Place in fridge for 10 minutes. Remove and roll mixture into balls. Place on baking paper lined trays. (You need just one tray or two depending on how large you roll the balls) 

Bake at 175 Celsius for about 8 - 10 minutes until the tops look dry and set. Remove from the oven, sprinkle with Sea Salt and let the cookies cool on the baking tray. With a small pallet knife loosen the cookies from the baking paper. Store in an airtight container.

Sunday, 24 March 2013

Rose Biscuits and a word of gratitude for the 'inheritance'

"I'd rather have roses on my table than diamonds on my neck."
Emma Goldman


Thank you. Thank you for the Cinnamon Sugar, Spice, Oils; the Coffee that I'm yet to drink and  the Tea that I have; as well as all the other goodies sitting in my larder today. Those wonderful store cupboard essentials.

Thank you also for the gorgeous chocolates, delicious biscuits, homemade mince pies and all the little things you've brought back on your trips home. 

These are for you. I ate five on your behalf with a nice, hot cup of 'inherited' Earl Grey. Here's wishing you all the best in the land of famous ruins, rose water and orange blossoms. 

ROSE BISCUITS

125g Salted Butter, softened
50g Icing Sugar, sifted
2 teaspoons Rose Water
1 drop Rose Essence
150g Plain Flour
A teeny bit of Pink Gel Paste

Put Butter and Sugar in a large bowl. Mix till combined with a spatula. Add in the Rose Water and Essence. gently mix through. Fold in the Flour until the mixture comes together into a soft ball of dough. Mix in the Pink Gel Paste until the dough is evenly distributed throughout.

Place dough in a biscuit press and press out shapes on a un-lined, un-greased baking tray. Press out shapes until all the dough has been used up. You may need 2 baking trays.

Bake the biscuits for about 20 - 25 minutes at 170 Celsius. Do turn the trays around at the 10 minute mark to ensure even baking and watch the biscuits so they don't burn. Remove from the oven and allow to cool on the tray before storing in an airtight container. 


You will notice that the biscuits are a teeny bit brown and not so clean a pink in colour. This is how I like them. Taking them out when they're just set, while the pink looks fresh and oh-so-pretty leaves you with a slightly under-baked biscuit. So I let them bake a little more for a crunchier biscuit. In my little kitchen, biscuits are crunchy and cookies are soft. 

Wednesday, 13 March 2013

"My friends are my estate." Emily Dickinson


You know who you are. You who bought the dragonfly plates with me at the Russian. You who feed me delicious Chocolate Chip Cookies and Ikan Bilis Curry. You who introduced me to Ginger Tea and a dog named Kuts, whom I fed with Famous Amos in the old days when we didn't know that chocolate was bad for her.

You whose house I pass every Sunday on the way to my swim. You with the aching shoulder and elfin haircut. You who taught me to love a well-made Long Island Iced Tea on a Friday night which ended on a Saturday morning. You who encouraged me to be stronger, to love more and take risks. You who listened to my woes and watched my tears. You, and only you whose house I can fall sick in without a worry.

Yes, you. These biscuits are for you.

You're too far away to eat them but you're not too far away for me to tell you that I'm Thinking Of You My Friend.

I'M-THINKING-OF-YOU BUTTER BISCUITS
Adapted from The Household COO

125g Salted Butter, softened
60g Icing Sugar, sifted
1/2 teaspoon Vanilla Essence
1/2 teaspoon Vanilla Bean Paste
130g Plain Flour
30g Custard Powder

Place Butter and Sugar in a bowl. Mix with spatula until combined. Add in both types of Vanilla and gently mix through. Fold in Flour and Custard Powder until well combined.

Put spoonfuls of dough into a biscuit press fitted with your favourite template and press-out biscuits on an unlined baking tray until all the dough is used up.

Bake in a moderate oven (about 155 Celsius) until lightly golden for about 15 - 20 minutes. Be careful not to burn the biscuits.

Once done, remove from the oven and let the biscuits cool on  the tray for about 20 minutes, then store in an airtight container.

Tuesday, 12 March 2013

Almond Butter Cookies


So... I made these to go with coffee at a dinner party. The recipe is from King Arthur Flour's webpage for Holiday Butter Cookies. Didn't think they were all that at first, but dressed-up with egg yolk and a sprinkling of almonds, they were lovely!

ALMOND BUTTER COOKIES
Adapted from King Arthur Flour

5oz Icing Sugar, sifted
9oz Salted Butter, softened
1 Egg Yolk
A pinch of Salt
1/2 teaspoon Vanilla Essence
11.5oz Plain Flour

1 Egg Yolk plus 1 teaspoon Water, mixed together
Almond Nibs

Place Butter and Sugar in a bowl. With spatula mix till combined. Mix in the Egg Yolk and Vanilla (or flavouring of your choice) making sure it is thoroughly combined into the creamed mixture.

Gently fold in the Salt and Flour. Mix with the spatula until the dough comes together and away from the sides of the bowl cleanly. Divide dough into half, shrink wrap and leave in fridge overnight.

The next day, remove one half of the dough from the fridge. Leave on kitchen counter top for 30 minutes. Then remove the shrink wrap and place dough between 2 sheets of plastic. Working quickly, roll dough to the desired thickness, cut shapes and place on a baking tray lined with baking paper until all the dough is used up. (At this point, you can either finish-up or do the same with the second bit of dough still in the fridge.)

Brush the biscuits with the additional Egg Yolk mixed with 1 teaspoon of Water. Sprinkle each biscuit with Almond Nibs.

Bake in a moderate oven (about 155 Celsius) for 20 - 25 minutes until the edges are lightly browned. Then remove from the oven and cool on the tray for about 20 minutes. Remove and store in an airtight container.


Chocolate Biscuits

If chocolate milk were a biscuit, this is what it would be. I think. Deeper and darker in taste perhaps, but still meltingly lush.


CHOCOLATE BISCUITS

125g Salted Butter, softened
50 - 60g Icing Sugar, sifted
1/4 teaspoon Vanilla Essence
130g Plain Flour
2 tablespoons good quality Cocoa Powder, sifted

Place the Butter and Sugar in a bowl. With a spatula gently mix together till combined. Add the Vanilla and mix into the creamed mixture. Add Flour and Cocoa Powder. Mix with spatula until the dough comes together.

You will know when to stop as the dough will leave the sides of the bowl cleanly.

Divide dough equally and roll into little balls. Place balls on a baking tray lined with baking paper about 1 inch apart. Press the little balls down with the back of a fork.

Bake in a moderate oven (about 155 Celsius) for about 20 to 25 minutes. When done, let the biscuits cool on the tray for about 20 minutes. Then remove from tray and store in an airtight container.

Notes
I use Kerrygold Irish salted butter.
I use Valrhona cocoa powder.
If you like a sweeter biscuit, you can add up to 70g icing sugar.
Biscuits will spread a bit while baking, so don't place them too close together.

Sunday, 30 September 2012

Orange Butter Biscuits and my new toy


These biscuits were a trip down memory lane. My mother used to make them in her light blue Sawa 71 for years until it broke in the late-80s.

After she passed on, I found the Sawa 71 tucked away at the back of her baking cupboard. It was in pristine condition and kept in its original box. However, the Sawa was well and truly broken.

There was nothing left to do but throw it away, despite not wanting to. Still, I wanted to hang on to it in some way, so I kept the metal discs which used to press out all my favourite biscuit shapes as a child. Hoping that one day I would be able to use it to press the same shapes out again. Of course, I put it away and forgot about it until... today!

Last week on a visit to Pastry Pro for some vanilla, I picked-up a Wilton Comfort Grip Cookie Press. Yesterday I tried it out with a simple butter biscuit recipe which worked beautifully.

This evening, just as I was about to put the washed and cleaned Cookie Press away, I remembered the metal discs I'd saved. They fit the Cookie Press perfectly and I am SO pleased. I've washed and cleaned them all. They are now lying on a towel air-drying in the kitchen. I cannot wait to use them. Perhaps next weekend when I have some time again.


Meanwhile, here's the recipe for yesterday's butter biscuits. It is quite a versatile dough, so you can flavour it as you like. I'm going to try making some chocolate biscuits next!

ORANGE BUTTER BISCUITS
Adapted from Obsessed with Baking

8 ounces Salted Butter, just softened
3 ounces Icing Sugar, sifted
1/4 teaspoon Sea Salt
1 Egg Yolk
10 ounces Plain Flour, sifted
1/4 teaspoon Vanilla Essence
1/2 teaspoon Vanilla Bean Paste
Grated zest of 1 large Orange

Cream butter and sugar with an electric mixer for 10 seconds. Add in salt, egg yolk, essence, paste and zest and cream for 5 seconds. Gently fold in flour by hand, just until all the flour is absorbed into the creamed mixture. Set aside. Follow manufacturer's instructions to prepare the Cookie Press with your favourite shaped disc. (You can change disc shapes in between batches) Fill the Cookie Press with the prepared biscuit dough and press out shapes accordingly onto a baking tray. Chill the pressed out dough in the fridge for about 15 minutes. Bake in a moderate oven for about 20 - 25 minutes until the biscuits are barely golden. (I baked my biscuits at 145 Celsius and switched the trays around midway for even baking) Leave to cool completely on the tray and store in an airtight container.  

Monday, 7 November 2011

Brown Butter Shortbread


After my success with the other shortbread, I made this recipe which I found on Lottie + Doof. I'm not sure yet how Toad liked this one, but it was a hit with K from the office. K said it would be lovely to eat dipped into a cup of strong, hot coffee. He also said that it was better than the other one. I'll let you be the judge of that. As for me, this is another winner from Alice Medrich.

BROWN BUTTER SHORTBREAD
Adapted from Lottie + Doof

180g unsalted Butter
90g Dark Muscovado Sugar
1 teaspoon Vanilla Essence
1/2 teaspoon Sea Salt
180g Plain Flour
Turbinado, Demerara or Granulated Sugar for sprinkling

Melt Butter in a heavy-based saucepan. Let it simmer on low fire until the butter turn a little brown and you can see some light brown specks at the bottom. The liquid should smell like toasted nuts and caramel. Once it does, remove saucepan from the heat and immediately place on a wet cloth to stop the cooking.

Remove from heat and stir in Salt, Sugar and Vanilla Essence. Fold in Flour with a wooden spoon. Mix gently until a soft dough forms. Pat into a round or rectangular fluted baking tin with a removable bottom and leave to stand overnight. When ready to bake, switch the oven on to 150 Celsius.

Place the baking tin on a baking tray (just in case some of the butter leaks out from the bottom during baking). Bake the shortbread for about 45 -50 minutes. Remove from the oven, sprinkle with the extra Sugar and let it cool for about 10 minutes. 

Remove shortbread from the tin carefully to avoid breaking it and cut the shortbread into squares or wedges. Place on a lined baking tray apart from each other and return to the oven for 15 - 20 minutes. Cool on a wire rack. Store in an airtight container.
Note
Making brown butter can take a little time. As long as you remember to melt the butter on low heat and just allow the butter to take its' time to brown you should be alright. Do NOT leave the butter on the stove unattended. Once the butter has melted, it can very quickly burn.

Enhanced by Zemanta

Saturday, 5 November 2011

And then there was shortbread...

I have shortbread baking in the oven right now and the smell is... (inhaling deeply) intoxicating to say the least. Tonight I've tried an Alice Medrich shortbread recipe. After the well-received Cocoa Brownies which I adapted a little to suit Toad, I've been keen on trying out more of her recipes.  I found this recipe on Smitten Kitchen.


Here is the recipe, adapted to metric measurements.

TWICE-BAKED SHORTBREAD
Adapted from Smitten Kitchen

180g unsalted Butter, melted and still warm
5 tablespoons Castor Sugar
1 teaspoon Vanilla Essence
Vanilla Seeds scrapped from 1 Vanilla Pod
1/4 teaspoon Sea Salt
180g Plain Flour
Turbinado, Demerara or Granulated Sugar for sprinkling

Melt Butter in a heavy-based saucepan.

Remove from heat and stir in Salt, Sugar, Vanilla Essence and Seeds. Fold in Flour with a wooden spoon. Mix gently until a soft dough forms. Pat into a round or rectangular fluted baking tin with a removable bottom and leave to stand 2 hours or overnight.

When ready to bake, switch the oven on to 150 Celsius. Place the baking tin on a baking tray (just in case some of the butter leaks out from the bottom during baking). Bake the shortbread for 45 minutes or until lightly golden.

Remove from the oven, sprinkle with the extra Sugar and let it cool for about 10 minutes. Remove the shortbread from the tin carefully to avoid breaking it and cut the shortbread into squares or wedges. Place on a lined baking tray apart from each other and return to the oven for 15 - 20 minutes.

Cool on a wire rack. Store in an airtight container.
Note
I only left it to stand for 1 hour. I was impatient. Alice is right in saying to leave it as long as overnight because when I made the Brown Butter Shortbread recipe later, it made all the difference. The 'long' leaving allows for the butter to absorb completely into the flour, which 'shortens' and dries-out the dough which in turn makes for a delightfully crunchy, crumbly and melt-in-the-mouth texture.

Sunday, 30 October 2011

1-2-3 Butter Cookies


It really is that simple, I promise. 

1-2-3 Butter Cookies

100g icing or castor sugar
200g butter, cold and cubed small
300g plain flour
  1. Preheat the oven at 130 Celsius. Line a baking tray or two with baking paper.  
  2. With an electric mixer, cream butter and sugar for 2 minutes.
  3. Fold in flour gently by hand until just incorporated.
  4. Chill dough for 15 - 20 minutes.
  5. Remove from refridgerator. Divide dough into two. Put one half back in to chill.
  6. Place the other half of dough between two plastic sheets and roll out about 4 - 5mm thick.
  7. Working quickly but surely, cut into your favourite shapes using a biscuit cutter. Place shapes on prepared baking tray.
  8. Once the first half of the dough is used up, take out the remaining half and do the same until all the dough is used up. (You may need 2 baking trays if your shapes are larger)
  9. Place tray in the oven and increase the temperature to 150 Celsius.
  10. Bake for about 20 - 25 minutes until the bottom edges start browning slightly.
  11. Remove from oven. Transfer to a wire rack and cool completely.
  12. Store in an airtight container.
Note:
  • The actual recipe comes from a magazine cut-out which was given to me a long time ago. I cannot remember which magazine it came from as it was already cut-out when passed to me. If anyone of you knows where it is from, please let me know as I would like to give the magazine due credit. I have also adapted the method to suit my own style of mixing biscuit dough.
  • I used icing sugar instead of castor for a finer texture.
  • I used unsalted butter in this batch and missed the salt terribly. Lesson learnt. I will use salted butter next time, or add in 1/4 teaspoon of sea salt. Yes, I have two feet firmly planted in the I-like-using-salted-butter-to-bake-for-better-flavour camp.
  • I made an orange-poppyseed flavoured biscuit with 1 tablespoon orange blossom water, 1 tablespoon poppyseeds and the grated zest of 1 orange.
  • For a vanilla biscuit, add in 1/2 teaspoon of vanilla essence or seeds scrapped from a vanilla pod at the creaming stage.
  • This is a versatile dough. You can flavour it any way you like.

Tuesday, 25 October 2011

A little dash of rum...


There are so many lovely recipe websites out there, but none so good as my favourite BBCGoodFood. They have lots of simple, yet gorgeous recipes that I love. I found this particular recipe when I was looking for Mexican Wedding Cookies. I certainly didn't need any encouragement to even try this recipe as it included RUM.

I simply couldn't keep my hands off the dough. I pinched away at it and it of course, found its merry way into my mouth! The flavour of rum is strongest before the actual baking (ahem... hence my pinching) and very mild in the finished biscuit. Perhaps an extra tablespoon of rum the next time I try this recipe? Let's see. The Toad loved them, so I just might make some more tomorrow... with the extra dose. Cheers!

Little Almond Cookies (or Rum Biscuits as I personally like to call them)
Adapted from BBCGoodFood

50g almond nibs, toasted
100g butter, softened
2 tablespoons castor sugar
1 tablespoon dark rum
140g - 175g plain flour
Vanilla seeds, scrapped from 1 vanilla pod
Icing sugar, to coat
  1. Preheat the oven at 140 Celsius. Line a baking tray with baking paper.
  2. Cream butter, sugar, vanilla seeds and rum about 1 minute with an electric mixer.
  3. Gently fold in the flour until mixed through. (I only needed 140g of plain flour)
  4. Gently fold in the toasted almond nibs.
  5. Bring it together into a soft dough.
  6. Roll dough between sheets of plastic to about 4 - 5mm thick.
  7. Using a biscuit cutter, cut out small circles and place onto the lined baking tray.
  8. Bake at 150 Celsius for about 20 - 25 minutes until the biscuit is just set with a tiny bit of browning along the edges. Remove from the oven.
  9. While still hot, coat in icing sugar. Let them cool completely on wire racks. Once cool, coat in icing sugar again.
  10. Store in an air-tight container or wrapped up individually in tissue/glass paper for a more fancy look.

Lime Meltaways


They're beautiful aren't they these snow-dusted lovelies? Reminds me of Christmas. The flavour is all at once sweet, slightly mouth-puckeringly-sour from the lime juice and melts in your mouth. I've made them more than a few times over the years. So here's the recipe and a big thanks to Martha Stewart for it!

Note: I've changed the original cup measurements to metric as I prefer to weigh my ingredients for consistent results.

Lime Meltaways
Adapted from Martha Stewart

180g butter, softened
100g icing sugar, sifted
225g plain flour, sifted
15g cornflour, sifted
1/4 teaspoon salt
Zest from 3 limes
2 tablespoons of freshly squeezed lime juice
1/2 teaspoon vanilla essence
1/2 teaspoon sweetened lime paste (optional)
Green food colouring (optional)
Icing sugar, to coat
  1. Cream salt, butter and icing sugar about 2 minutes with electric mixer.
  2. Add in lime zest, vanilla, lime paste and juice. Mix about 1 minute.
  3. Gently fold in by hand the plain flour and cornflour.
  4. Add tiny drops of green food colouring into the dough  mixing gently until you achieve the intensity of colour you like, then stop.
  5. Divide the dough and roll in two separate pieces of baking paper. Twist the ends close and leave it in the fridge for 2 hours or overnight.
  6. Preheat oven to 150 Celsius. Line a baking tray with baking paper.
  7. Remove a roll from the fridge and cut  into slices with a sharp knife. Place slices on the lined baking tray, leaving some space in between each one as they will expand a bit. (Leave the remaining roll in the fridge for the time being)
  8. Put the baking tray into the oven and bake for about 20 - 30  minutes until the edges of the biscuits just turn a little brown. Remove from the oven and let it cool on wire racks.
  9. Continue with the remaining roll in the fridge or leave it for a biscuit craving later in the week.
  10. Once cool, coat in icing sugar on all sides, place in paper cases and store in an air-tight container.


Enhanced by Zemanta

Monday, 15 August 2011

Deeper, darker...


So I have itchy fingers sometimes. This means I can't quite leave a recipe alone, even if it is a good one. What did I do? I took the Crunchy Chocolate Chip Cookie recipe and tweaked it. All in the name of using my newly purchased organic muscovado sugar of course. (wink, wink)

I'm happy to say that this cookie tasted like I thought it would. While the original recipe has a straightforward vanilla-sugar-chocolate-chip taste, this one has deeper caramel-toffee undertones. I'd like to think as one being perfect for a cup of tea and the other for coffee.

In case you're wondering - yes - I'm reading 1000 Years of Annoying the French by Stephen Clarke courtesy of the Toad. It's a thick book, so I've taken to reading a chapter every night before going to bed... hence the shadows in my photo of the cookies. 

Deeper, Darker Chocolate Chip Cookies

160g plain flour
35g corn flour
1/2 teaspoon baking powder
Pinch of sea salt
130g salted butter, at room temperature
60g castor sugar
20g  light brown sugar
10g dark muscovado sugar
1 teaspoon vanilla essence
1 egg
100g semi-sweet mini chocolate chips
30g toasted walnuts, chopped
  1. Preheat oven at 120 Celsius.
  2. Sieve plain flour, corn flour, baking powder and sea salt together. Set aside. 
  3. Cream butter and three sugars until pale.
  4. Add in egg and vanilla essence. Cream for 1 minute, until well combined. 
  5. Gently fold in the sieved flour mixture by hand.
  6. Add in chocolate chips and walnuts. Fold this in gently by hand as well. 
  7. Cover mixing bowl with clingfilm and chill dough in the refrigerator for 30 - 45 minutes.
  8. Remove dough from refrigerator.
  9. Make small round balls and place about 2 inches apart on a baking paper lined tray.
  10. Bake at 150 Celsius for about 15 - 20  minutes until the edges turn a light golden brown.  
  11. Cool cookies on the tray for about 10 minutes before moving them to a wire rack to cool completely. 
  12. Once cooled, pack cookies away into an airtight jar.